
This is the second time I've shot these annual portraits for this charity. I learned a lot the first time through, and this second round turned out much better in camera. I used better lighting, and I was able to plan ahead when shooting to help make the required postprocessing go more smoothly.

- My key was a Sunpak 544 into a reflective 30" umbrella about 45 degrees to camera left (standing on the table) and a little above my subjects.
- Fill was a Vivitar 283 into another reflective 30" umbrella as close as I could get it to camera right and at the same height as the camera.
- The hair light was a Canon 430EX mounted on a boom above & behind the subjects to camera right, shooting through an 8x10" DIY soft box.
- The background was lit by a Starblitz 3600 DFNi on a short tripod directly behind the subjects' knees and pointed up at the wall through a Stofen Omni-Bounce.
This wouldn't have been so bad if the room was empty, but the large, immobile conference table created some obstacles. Most significantly, I had to place my subjects much closer to the background than I would have liked. Because of this, I didn't have room to setup my own backdrop, and instead used the room's olive-colored painted wall as my background. It's a decent color, but it's also somewhat reflective, which created some hot spots when my key, fill & hair lights bounced off it.
 |
| Original image, straight out of camera. Compare this to the final image above. |
Another issue is common to many multiple-subject portraits, and not specific to this job. Namely, it's always difficult to get everybody looking their best in a single shot. In three separate instances, I couldn't get a single shot in which both the husband & wife looked great, but I did get several photos in which one or the other looked great. Thanks to the wonders of digital photography, I was able to combine these images into one by cutting & pasting a head during post. When the shooting conditions are controlled, that's a lot easier than it first sounds.
The final big cause of postprocessing is basic vanity. Whether they voice this or not, people like to look their best in a portrait, and that means cleaning up little things like stray hairs, zits, wrinkles, and dandruff. Cleaning this stuff up--at least to a basic, less-noticeable degree--is actually pretty straightforward. While none of the subjects requested it, this step really does make the portrait more pleasing.
Here's a little more detail on how I did it. Most people call these techniques "photoshopping" after Adobe's industry-leading software package. There are actually several programs that will do this type of editing, and many of them cost considerably less. The GNU Image Manipulation Program ("The GIMP") is a free program that handles most image processing tasks quite nicely. It's available for Windows, MacOS, and Linux, which is handy for a Linux guy like me. There are numerous good books available on The GIMP, so if you want to get up to speed quickly, please check those out.
Background reflections:
 |
| Background wall, color corrected to match flashes |
 |
| Portion of background painted into final image |
Eyeglass reflections:
 |
| Original image with fill light reflections |
If I'd been thinking ahead, I'd have had my eyeglass-wearing subjects remove their spectacles for one shot so that I had some good material that I could use to paste over the reflections. As it was, I had to make do with the lowest reflection I could manage from another less-than-perfect shot.
 |
| Corrected image |
Sometimes, I didn't have a great unreflected eye to work with, so I had to paint in areas using the heal or clone tool. This technique is discussed more under "skin blemishes" below.
Head swaps:
 |
| New head masked out from a different photo |
Once again, I made use of multiple layers in GIMP. I chose the best overall shot--or sometimes the best shot of the person with the longest hair--to be my primary shot. I then took the best shot of the person who had the cleanest neck line (usually the husband) and added it as a second layer with a transparent opacity mask.
 |
| New head pasted in place |
The subjects were never in exactly the same spot in both photos, so once the new head was exposed, I drug the second layer (the head layer) around until the new head lined up perfectly with the old neck. If any of the old head was still visible, I expanded the new head's layer mask to cover up the old head. I also cleaned up the feathered mask around the neck & collar to make sure the transition was seamless.
This actually turned out to be a rather simple operation.
Skin blemishes:
 |
| Original image |
To do this, I used the clone & healing tools in The GIMP. There are several good tutorials on YouTube & elsewhere for using each of these tools, so I won't duplicate their content here. Here's one good one. I performed all of these operations in a new layer, duplicated from the original, so that I could easily turn them off & on to see my progress, or revert just part of my modifications using a layer mask.
 |
| Softened skin |
The healing tool still replaces its contents with a nearby area, but it does so more smoothly. Using a healing tool with a 30% opacity is a great way to reduce the impact of wrinkles without removing them entirely. You should always start with a low opacity and just draw over the area again if you need a stronger effect. Removing zits and bumps always ended up with 100% opacity, for obvious reasons.
Teeth whitening:
In some instances (but not the example shown here), I bleached & brightened teeth a little, too. As with the skin, I didn't want to go crazy with the whitening. My goal was to make it look better without making it obvious that I did anything at all. That's really the goal of this entire process, in fact.
As before, I created a new layer in The GIMP by cloning the original layer. In this new layer, I lowered the saturation by 30% and then brightened the whole image by about 2-3 stops. I then created a transparent layer mask and slowly painted in the mask over the teeth using a small, feathered brush with only about 20% opacity. I painted over the teeth several times to build up the opacity while maintaining a soft edge. This allowed me to concentrate more on areas that needed more help. It's a pretty quick, straightforward process.
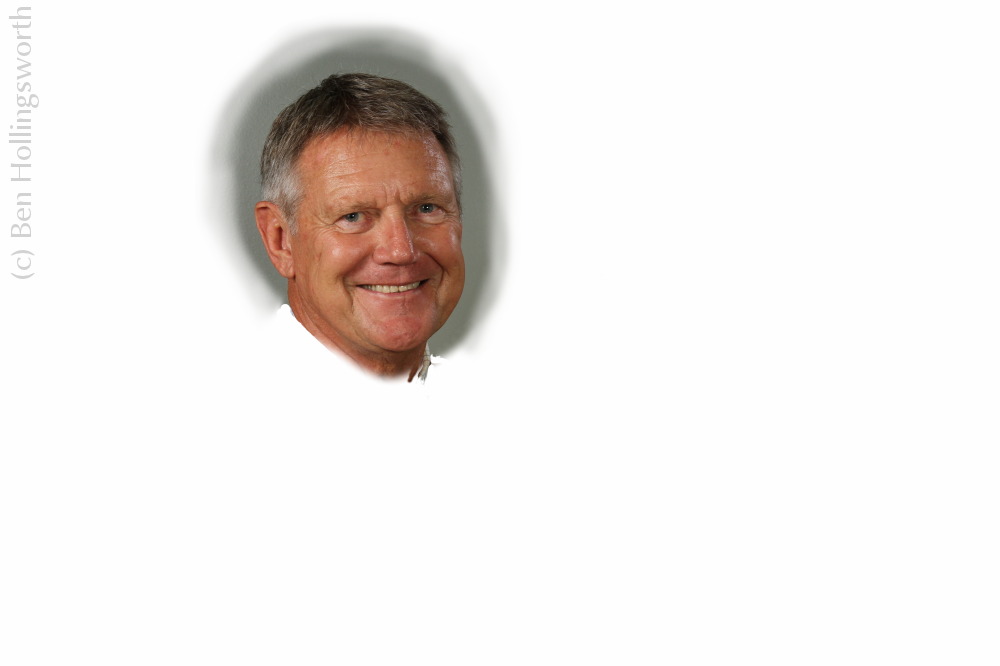
So those are the basic techniques that I use for portrait retouching. I think the results turned out rather well. I'm far from an expert here, but I'd be happy to elaborate on this if any of you have any questions; just speak up in the comments below. I'm also very eager to hear any suggestions you have for improving this process. If you want to read more about the software I use for general postprocessing on Linux, read this post. Once again, here is the original image followed by the final image:
|
| Original image, straight out of camera |
|
| Final image with about 45 minutes of postprocessing |
No comments:
Post a Comment
Please leave your comment below. Comments are moderated, so don't be alarmed if your note doesn't appear immediately. Also, please don't use my blog to advertise your own web site unless it's related to the discussion at hand.